
*View accurate shipping rates and availability






36 Items


Up to 70% off across the store, plus free towels and mirrors up for grabs on orders over $800*


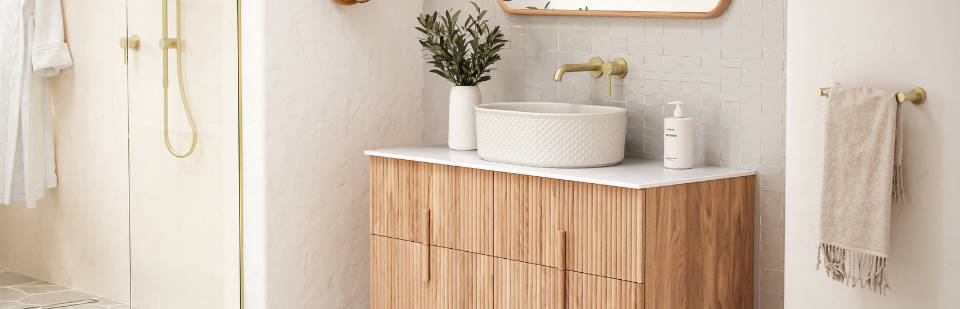


A basin spout is the outlet that puts water into the basin. This page holds basin spouts and basin outlets from Nero, Caroma, Phoenix and Clark, wall mounted and hob mounted, fixed, swivelling, progressive and sensor operated, in brass, gold, gunmetal, brushed nickel, chrome, black and bronze. The guide below explains what a spout is and how it differs from a mixer, how to choose the mounting and the reach, how the water is controlled, and how to look after the finish.
A basin spout delivers water and does nothing else. The control is a separate part: a wall mixer, a pair of handles, a progressive handle or a sensor. That is the difference between a spout and a mixer. A mixer is one fitting that has the control and the outlet together. A spout is only the outlet, and it is paired with a control somewhere else on the wall or the bench. See basin mixers if you want the control and the outlet in one piece, and spouts for the full group of spouts for the basin, the bath and the shower.
There are two reasons to choose a spout. The first is a design where the control is on the wall and the outlet is on the basin, or the other way round, and the second is a new spout for an existing control. Many bathrooms with wall mixers use a spout to carry the water out over the basin, and the effect is a tidy, floating look with nothing on the vanity top.
A wall mounted basin spout comes out of the wall above the basin. It suits a wall hung basin, a bench basin with a tiled wall behind it or a vanity with a bowl that sits close to the wall. The pipe sits inside the wall, so its position has to be settled before the tiles go on, and the height and the reach have to match the basin. A wall spout leaves the basin edge clear, and that makes the vanity top easy to wipe.
A hob mounted spout stands on the basin or the vanity top, through a tap hole. It suits a basin where the wall is not an option, such as a vanity in the middle of a room, or a basin with a tap deck. It needs the supply pipes and the control below the bench, and it needs a hole of the right size. Check the hole size for the model you choose before the bench is cut.
The reach, or projection, is how far the spout stands out from the wall. A spout that is too short drops water onto the sloping side of the basin, and one that is too long can land it on the far edge. The best reach lands the water close to the drain, so the stream hits the basin floor and not the wall of the bowl. Basin spouts here come in reaches such as 160mm, 180mm, 200mm and 230mm, so there is a length for most basins.
Makers measure the reach in different ways. Some measure from the wall to the centre of the spout and others measure to the end of it, so compare the same measure across two models before you decide. For the height, the spout sits above the rim of the basin by enough room to put a hand underneath, and to rinse a toothbrush or fill a glass. Mock up the position with a strip of tape on the wall and a cardboard template before the plumber fixes the pipe, and check it by standing at the basin.
A fixed outlet points straight out, and it suits a single basin with one outlet position. A swivel outlet turns on its base, which suits a hob spout that serves two sides of a corner, or a spout that has to reach both a basin and a bath. See bath tub spouts for the matching group at the bath.
A progressive outlet is part of a progressive set, where one handle brings the water on cold and then warms it as you turn. The spout is only the outlet, and the handle in the wall controls it. See wall basin and bath mixer sets for those. A sensor outlet is switched by a sensor, and it suits a place where touch free use matters, such as a powder room or a busy family bathroom. A sensor spout needs a power source and the sensor setup, so ask the plumber and the electrician about the supply before you order.
A wall spout has to be paired with a control. The choices are a wall mixer with one lever, a pair of wall handles, a progressive handle or a sensor. Choose the control first, if you can, and then choose the spout in the same range and finish. The plate, the handle and the spout then share a shape and a metal, and the set reads as one design.
The pipes have to match. A wall mixer and a spout need their supply and outlet at the right spacing, and the plumber needs the details for both parts before the wall is closed. A mixer made for one range does not always fit the spout of another. When you pick parts from different ranges, ask the plumber to check them before the order.
Nero has the largest group here, with ranges such as Opal Progressive, Serenity and X Plus. See Nero taps. Caroma includes Liano II and Urbane II, including a sensor hob outlet, and see Caroma taps and Caroma spouts. Phoenix includes Vivid Slimline, Teel and Mekko, and see Phoenix taps and Phoenix spouts. Clark has a square wall spout, and see Clark taps and Clark spouts.
Chrome is the easiest finish to match and the simplest to clean. Brushed nickel is a soft silver that hides water marks. Black is a strong choice against white tiles, and it shows water spots, so plan for a wipe now and then. Gunmetal is a deep grey that sits between nickel and black. Brass, gold and bronze are warm metals that suit timber, stone and brass handles.
Most of the spouts here are lead free brass, and the rest are brass. A basin spout supplies water you brush your teeth with, so lead free brass is the better choice. Check the material and the compliance marks on the model you choose. Match the finish to the other metal in the room, such as the basin waste, the towel rail and the mixer, since a gold on one maker is not the same tone as a gold on another.
A wall spout is fixed to a solid backing, so it does not move when it is knocked or leaned on. The plumber positions the pipe at the right height, seals the plate to the tile and tests the spout for leaks. A hob spout is fixed through the hole with a nut under the bench, and it is connected to the supply with flexible hoses. Plumbing work has to be done by a licensed plumber, and the installation sheet supplied with the spout is the reference for the connection and the fixings.
Leave access to the supply pipes and the isolation taps. A vanity with drawers can block the pipes, so check the drawer and the pipe positions with the plumber before the vanity is fixed. For a wall spout, the wall behind the basin needs to be ready before the tiles go on, because the pipe cannot be moved after that.
The spout does not set the flow. The flow depends on the supply pressure and on the control that feeds it, so a spout on a low pressure supply runs gently with any control. A spout with a wide outlet gives a soft stream, and one with an aerator mixes air into the water, so the stream feels fuller at a lower flow. Taps sold in Australia carry a WELS rating for water efficiency, so check the rating for the model you choose.
Wipe the spout with a soft, damp cloth and mild soap, and dry it with a soft cloth to prevent water marks. Do not use abrasive pads, bleach or strong bathroom cleaners, because they can damage brushed, black and coloured finishes. Clean the aerator if the flow becomes uneven, by unscrewing it and rinsing it under the tap. Hard water leaves scale at the outlet, and a soak in a mild cleaner will clear it. A sensor spout needs the sensor window wiped clean, so it keeps reading properly.
For a basin outlet with the control built in, see basin mixers, tall basin mixers and bathroom taps and mixers. For a tap from any brand, start at taps.


